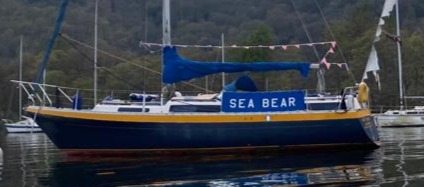
New Windows - "A fresh new look"
- David Cooke
- Apr 28, 2022
- 3 min read
The Easter holidays was an exciting week for Sea Bear.

Since we acquired Sea Bear, her old and very dated windows have continually dripped and leaked at the slightest hint of poor weather. This constant dripping has resulted in most of the interior around the windows being stained or worse meaning a rather large internal refit project but that's another story.
We had explored various options for stopping the leaky windows, and decided to take the plunge and remove the old original windows and replace them with something a little more modern looking.
Having taken delivery of our new windows we opened the boxes with excitement and began to plan the removal and installation of the new glazing.
We'd like to thank simplyplastics.com for the quick turn around on the preparation of the replacement glass, cut beautifully with the correct shapes and sizes to meet our needs.
The project begins.

The original widows were metal framed as shown above. Having removed all the screws (varying in size and type) we pulled all the windows out in turn revealing the state of disrepair and wear as well as the gathered water held within the frames from the numerous leaks.

Almost all of the frames were unsalvageable and the glass was in a sorry state (in some cases completely opaque). Given we already knew that there was going to be no reuse of these frames we had the replacement windows pre-cut.

With the whole family involved, switching between cross and flat screw-drivers, sometimes resorting to vice-grips and pliers to remove stripped screws, the removal of the original frames quickly became a very slick operation.


Having removed the original frames, the work began with preparing the surface, removing the years of patched sealants, and cleaning the fibreglass for the application of the new portlights.

After sealing up the interior to stop the fiberglass dust from settling into everything in the boat, Maura and Eddie made quick work of removing the old sealant and years of built up leak patches to have a smooth and prepared surface for the application of the new windows.
Washing the prepared surface with alcohol and allowing to dry, the areas were ready for the application of the new windows.
With the opening fully prepared, and the new windows positioned and aligned to match the original positions, the window openings were then taped up to ensure that the Sikaflex® did not spill out onto the deck surfaces.

Having been over 20 years since using Sikaflex on a similar glazing project on a much larger vessel, the memory of product's amazing durability and longevity, as well as the difficulty of removing the product from areas where it was not intended, remained firmly in my mind.
Many thanks to gbr.sika.com for continuing to develop such a great range of products.
So, after preparing the surfaces and the glazing, (removing only the areas of tape where the glazing would be attached to the fibreglass (Thanks Eddie for your attention to detail in this endeavour) the Sikaflex was applied to the appropriate areas and the glazing applied.
With firm pressure applied from both outside and inside (using suction cup attachments to pull from the inside) the glazing was installed and allowed to set.

After a few minutes of drying time, The masking tape was removed from around the new glazing, the internal and external protective sheeting removed, and any over spill of sika removed with alcohol wipes. The final product was revealed.

The views from inside, almost provide a "there is a hole in the boat" view of the outside world.
With the new windows installed, The big job of tidying up the interior as shown above will begin over the next few months. Another large project to be featured, so watch this space.


So, What next?
The final element of this project is to tape up and apply a finishing seal around the windows, to give not only a functional additional waterproof seal but also an aesthetic frame to give a professional finish to the exterior.
Given the size of the project we would also like to massive thank you to the Windermere Lake Wardens for their patience and understanding during the installation (considering that a side project of replacing the alternator fan belt delayed our departure from Ferry Nab).


Comments